So you have the Salesforce Nonprofit Success Pack (NPSP) and would like to create the Volunteers for Salesforce (V4S) integration on your website? This post takes you through easiest way to show the calendar for your volunteers to signup –using the Sawfish WordPress plugin.
We will build:
- A Calendar to show the upcoming Volunteer Shifts in month, week, day and list view
- A form for Volunteers to Sign up for each shift
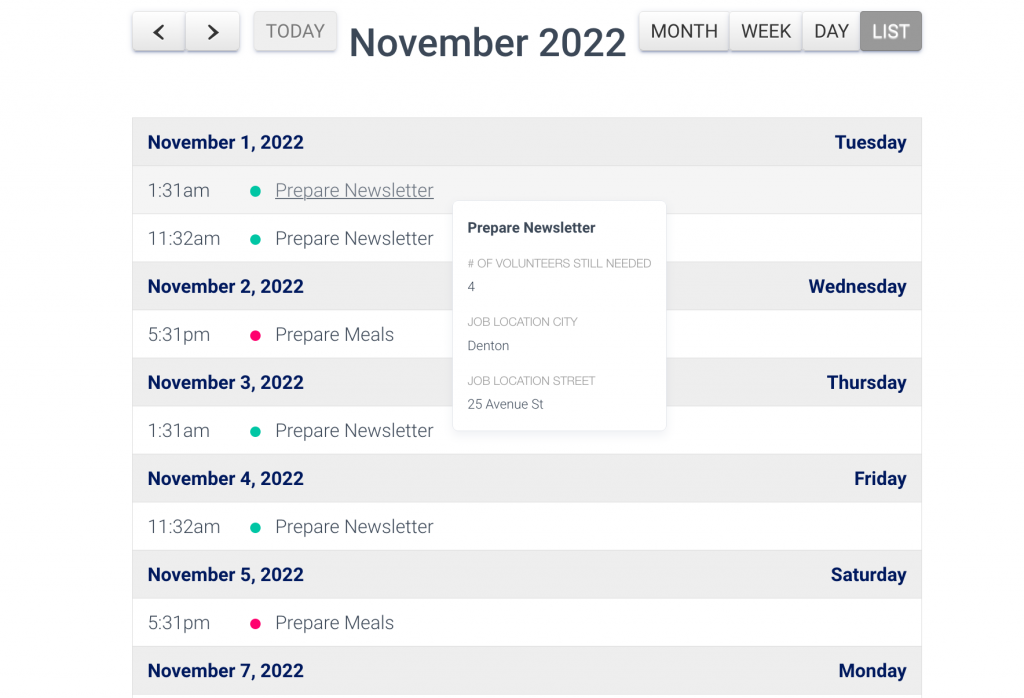
The best thing about this approach is that the calendar and form would match your website theme and styling, without any extra code like iframe. You can also any amount of additional customizations since the pages are inside your WordPress! Here’s how it would look like:

In short, the steps to setup up the Salesforce Nonprofit Website Integration for WordPress are:
- Install the Sawfish WordPress-Salesforce Integration Plugin
- Add Formula fields for the Volunteer Calendar
- Create the Volunteer Shift Calendar Page
- Add the Volunteer Signup Page in WordPress
We’ll cover these steps below so that you can get the Volunteers for Salesforce (V4S) integration up and running in a few minutes.
Install the Sawfish WordPress-Salesforce Integration Plugin
The first step is to download and install the Sawfish WordPress plugin from sfplugin.com. There also step-by-step instructions to setup the connection from Salesforce.

The plugin creates a two-way integration with WordPress and Salesforce using the Salesforce API.
This means that you will be able:
- Show Volunteer Shifts on WordPress
- Let Volunteers sign up to shifts from WordPress
.. and
- Show a list of records from any object in various layouts
- Create a login portal and show information relevant to specific records
- Update and Create Salesforce records from WordPress
- Create pages using Salesforce records
For the form features, download and install the HTML forms plugin. It is free and lightweight, we will use this to quickly create the Volunteer forms.

After installing, click on the Add New Layoutpage from the plugin option in WordPress.
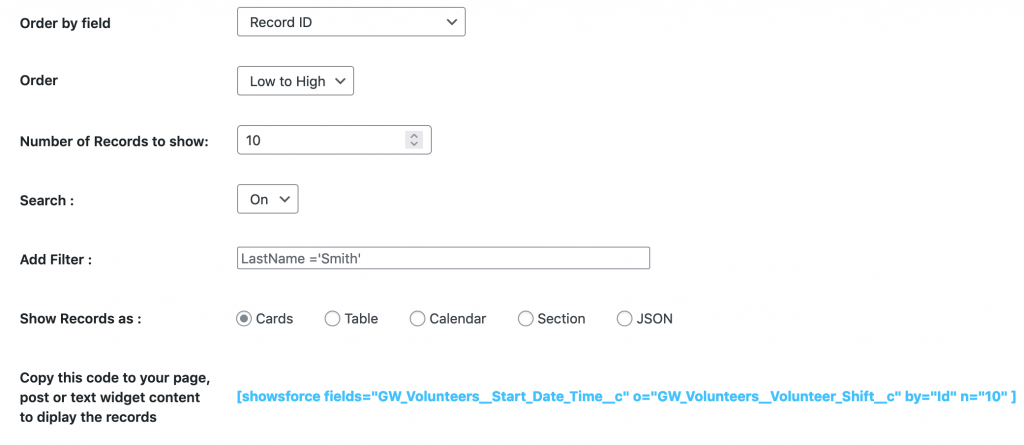
You can now select the layout you’d like to show the records from the object. The plugin creates a shortcode that you can use to create the calendar inside the WordPress page. The Order by fieldandAdd Filteroption can be used to show a specific set of records. For instance, all the Volunteer Shifts that have the current month as Start Date & Time.
Here’s a sample page that shows Salesforce records using the Cards layout.
Now that we have the plugin installed and the connection setup, let’s build the Volunteer Shift Calendar and Sign Up form.
Add Formula fields for the Volunteer Calendar
The connection is all set to pull information from Salesforce.
Remember, we are setting up a pure connection using without using additional Salesforce Apex code or Flows. Therefore, we have to make sure the field values we show are in the right format for the webpage. We will setup two formula fields on Salesforce.
Job Name text field
The calendar we are designing shows the Volunteer Job name in the shift.

However, in the Volunteer Shift object the Volunteer Job is a lookup field. Salesforce stores lookup field as Ids.
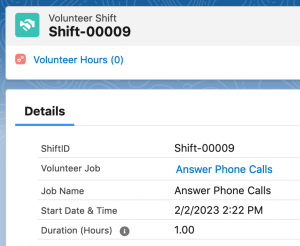
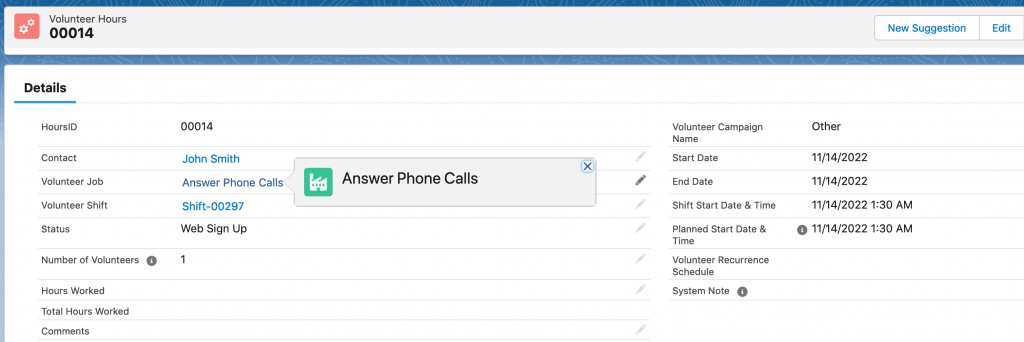
So if we pull that information it would show Volunteer Job field as ‘a090K000015MbpKQAB‘ instead of ‘Answer Phone Calls‘. Will create a formula field to show Job Name similar to the field in the image above.
Create a New Field in the Volunteer Shift object –Job Name, with type Text. If you’ve not created formula fields before, check out this neat guide here on Salesforce Trailhead(or send a quick email to the plugin support team).
Copy and paste the formula below:
GW_Volunteers__Volunteer_Job__r.NameSave the field. It is optional to add this new field to your current Salesforce Page Layout. Now we’re ready to pull Job Name as text output to use WordPress.
Volunteer Signup Link field
This will automatically create a Volunteer Signup Link on WordPress for specific a Volunteer Job and Shift. In other words, every Job shift added to Calendar will have a custom signup link that will set the fields in the Volunteer Sign Up form. The Volunteer would just have to click on the shift they would like to Volunteer in and enter the remaining fields –their contact information.
We will create a Formula field that shows the value like below.

Once again, from the Volunteer Shifts object add a text type formula field. Name this field as Sign Up Link, you can copy and paste the formula below.
"/volunteer-signup/?job="& GW_Volunteers__Volunteer_Job__c &"&shift="& Id & "&jobdate="&TEXT(DATEVALUE(GW_Volunteers__Start_Date_Time__c))Complete the field creation. Once again, it is optional to add this to your Salesforce layout.
Now we’re ready to add the Calendar!
Show upcoming Volunteers Job Shifts in WordPress calendar
We start setting up the calendar, by specifying the records we want to display.
Switch to your WordPress dashboard. Now click the Add New Layoutoption from Sawfish Connect
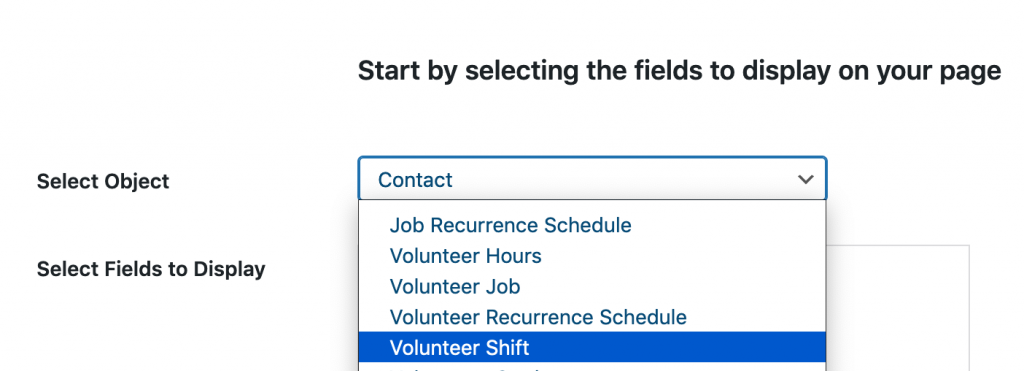
Select the Volunteer Shift Object. Now, set the fields you’d like to display.
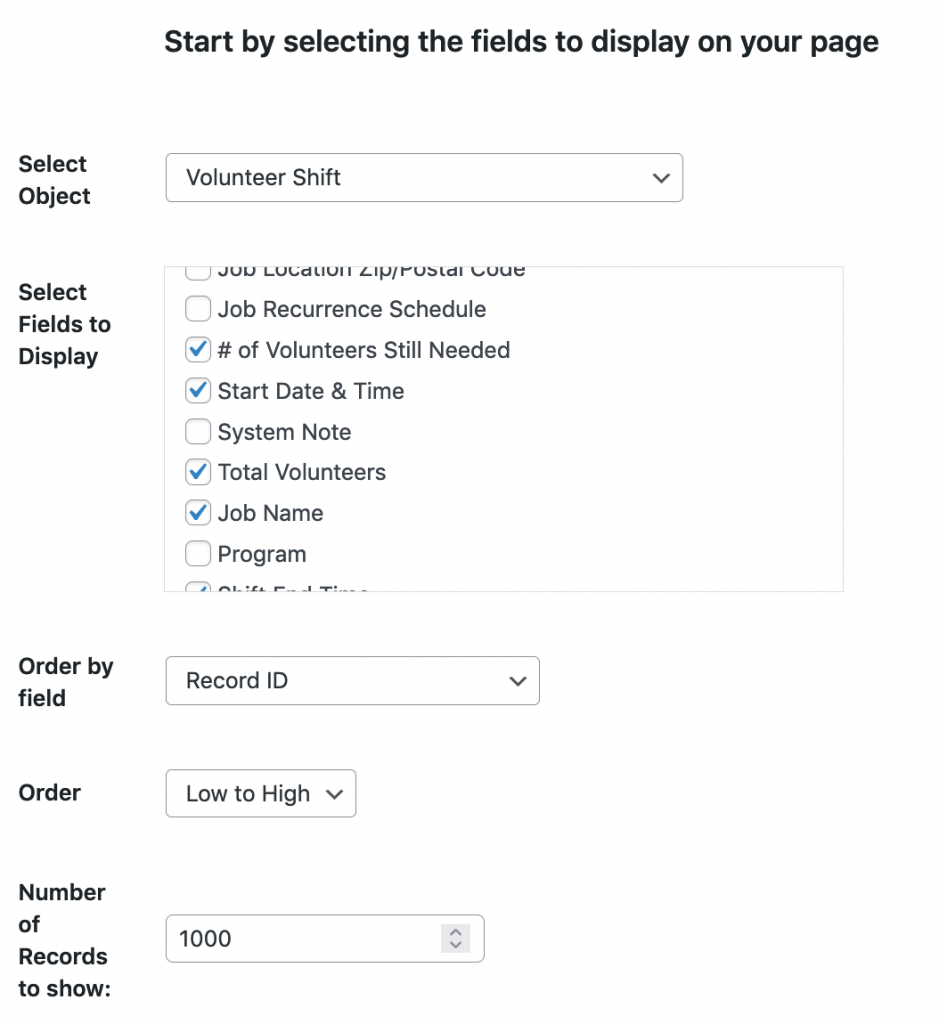
Next we will select the fields to show in the Calendar. In addition to the Job Name, Start Date & Time the plugin also lets you add additional fields in a popup. This would show when the user moves the mouse pointer over the Shift as shown below.

In the Add Filter we can control the Volunteer Shift records shows in Calendar. It uses the same format used in Salesforce SOQL queries. For instance, the filter below is set to show this month’s shifts. We can also combine filters with AND, OR and NOT.

A lot of Sawfish plugins users set it as
GW_Volunteers__Start_Date_Time__c = NEXT_90_DAYS AND GW_Volunteers__Volunteer_Job__r.GW_Volunteers__Display_on_Website__c = true
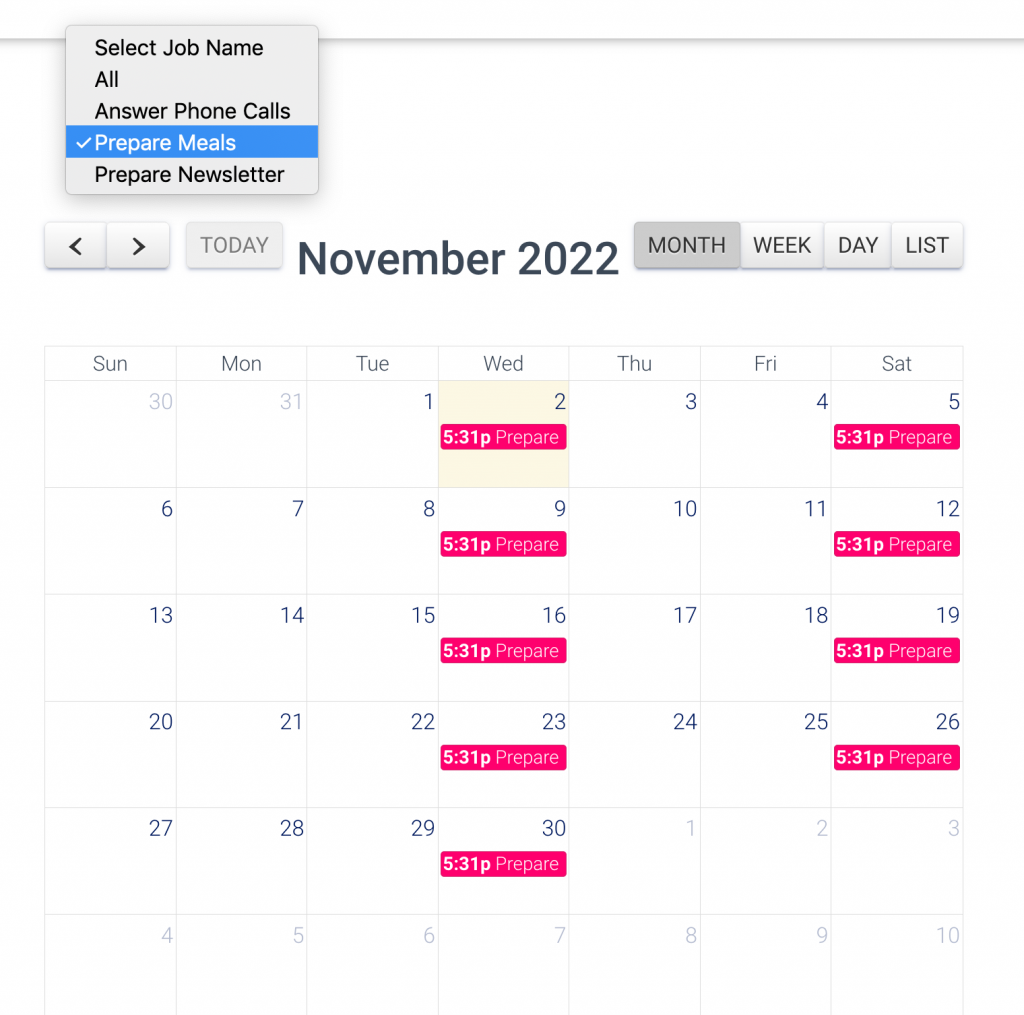
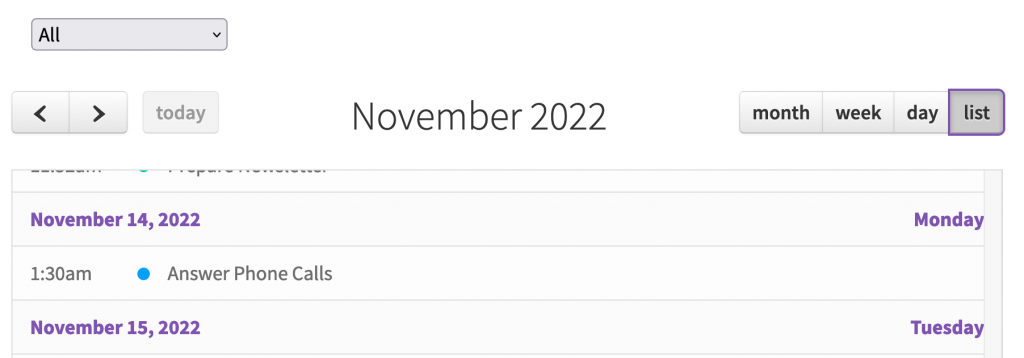
The volunteer may want to see Shifts by category. We can do just that by setting Category to Job Name. It would give the below result. The plugin also has the option to add more drop down filters (ideally Picklist fields).
In the Event link select the Signup Link field. This is the formula field that we created before for the specific links. When the user clicks on an event in the calendar, it would navigate to the value in this field.

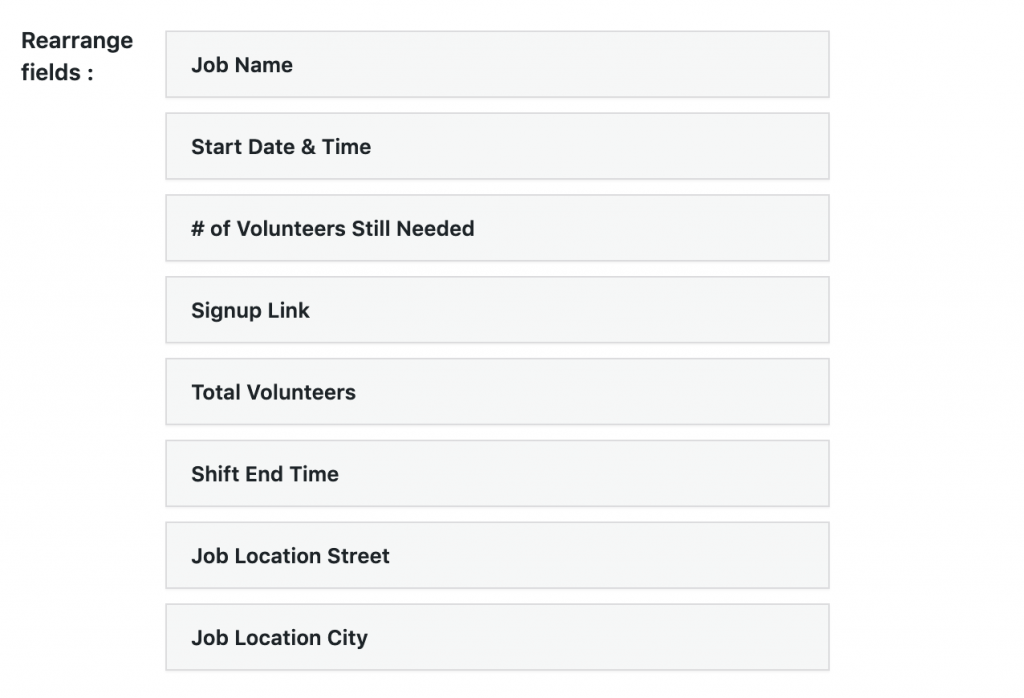
After this, select the additional fields you’d like to show in the Popup.

Finally, in the rearrange fields options make sure the the Shift Date & Time is set as the second field andJob Name as the first.
All Set! Now copy the shortcode and paste it on the page where you want the calendar.

In the below image, we have pasted the shortcode on the Classic Editor. You can add the shortcode in your Page Builders as well like Elementor, Divi, WPBakery etc.
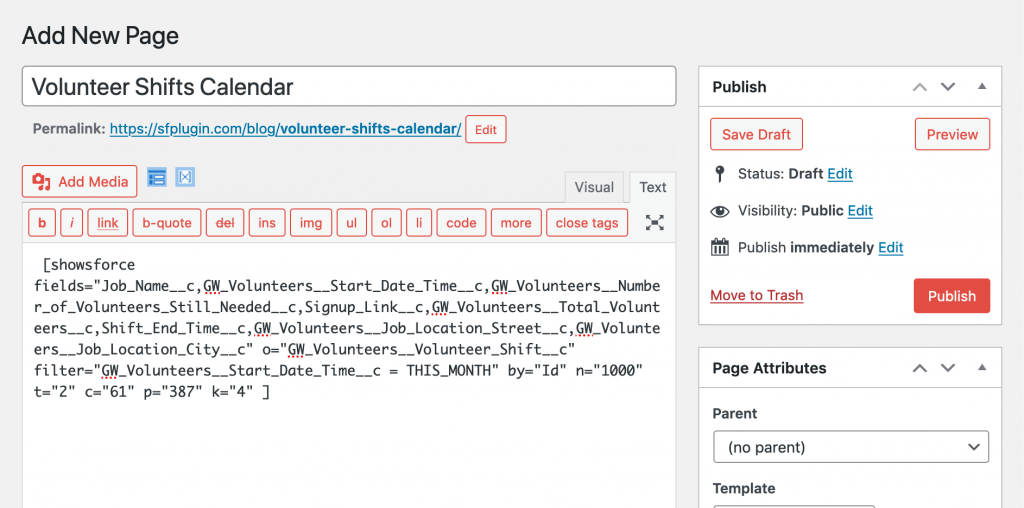
Here’s how it looks on the page.
The design will be according your WordPress theme. Here’s how the list view looks on Hestia theme. The event colors can be edited as well to suit your brand colors instead of the bright colors.
Try clicking on any of the Job Shifts.

The page will navigate to a not found page. If you check the web address bar, you can see that the calendar is set to forwarding users to the Volunteer Signup page with the link volunteer-signup.
yourwebsite.com/volunteer-signup/?job=a090K00001BClxh&shift=a0B0K000016It7y&jobdate=2022-11-09
Let’s create this page!
Add the Volunteer Sign Up Page in WordPress
Select Add New Page from your WordPress dashboard, and create a new page with the permalink: volunteer-signup. Now, publish the page.

If you’d like to set a different page link, just copy the permalink and replace the volunteer-signup part of the address with yours onto the formula fieldwe created in Salesforce.
Now, when the volunteer clicks on a shift it forwards to this new Volunteer Signup page!
The plugin can also retrieve information from Salesforce records to show on this page. That means optionally, can show a neat description of the Volunteer Job, Location, shifts as well above the form.
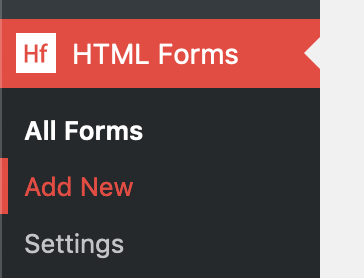
Let’s add a form! Click the Add New option from the HTML Forms plugin from the WordPress dashboard.
The form interface is easy to use. You can either drag new fields onto to form or add html.
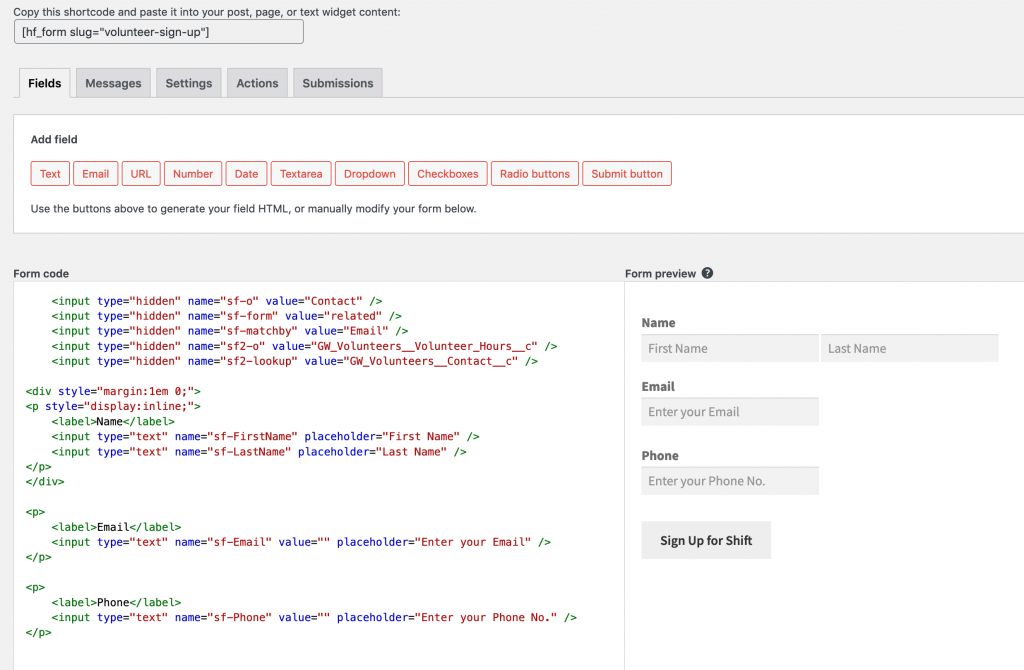
We already have set the right fields so you can a working Volunteer Signup form!
Copy paste the code from below.
<input name="sf-o" type="hidden" value="Contact" />
<input name="sf-form" type="hidden" value="related" />
<input name="sf-matchby" type="hidden" value="Email" />
<input name="sf2-o" type="hidden" value="GW_Volunteers__Volunteer_Hours__c" />
<input name="sf2-lookup" type="hidden" value="GW_Volunteers__Contact__c" />
<div style="margin: 1em 0;">
<p style="display: inline;"><label>Name</label> <input name="sf-FirstName" type="text" placeholder="First Name" /> <input name="sf-LastName" type="text" placeholder="Last Name" /></p>
</div>
<label>Email</label> <input name="sf-Email" type="text" value="" placeholder="Enter your Email" /> <label>Phone</label> <input name="sf-Phone" type="text" value="" placeholder="Enter your Phone No." /> <!-- Volunteer Hour Record !--> <!-- Start Date !--> <input id="jobdate" name="sf2-GW_Volunteers__Start_Date__c" type="hidden" value="{{url_params.jobdate}}" /> <!-- Volunteer Jobs !--> <input id="job" name="sf2-GW_Volunteers__Volunteer_Job__c" type="hidden" value="{{url_params.job}}" /> <!-- Volunteer Shift !--> <input id="shift" name="sf2-GW_Volunteers__Volunteer_Shift__c" type="hidden" value="{{url_params.shift}}" /> <!-- No. of Volunteers !--> <input name="sf2-GW_Volunteers__Number_of_Volunteers__c" type="hidden" value="1" /> <!-- Hour Status !--> <input name="sf2-GW_Volunteers__Status__c" type="hidden" value="Web Sign Up" />
<p style="margin: 2em 0;"><input type="submit" value="Sign Up for Shift" /></p>
This form does the following things.
- Checks if a Contact exists with the Email
- If a Contact does not exist, it creates a new Contact for the Volunteer
- It creates a Volunteer Hour record with the Volunteer Shift
- Assigns the Contact to this Volunteer Hour
That’s it! Finally, copy paste the form shortcode onto the Volunteer Signup page.
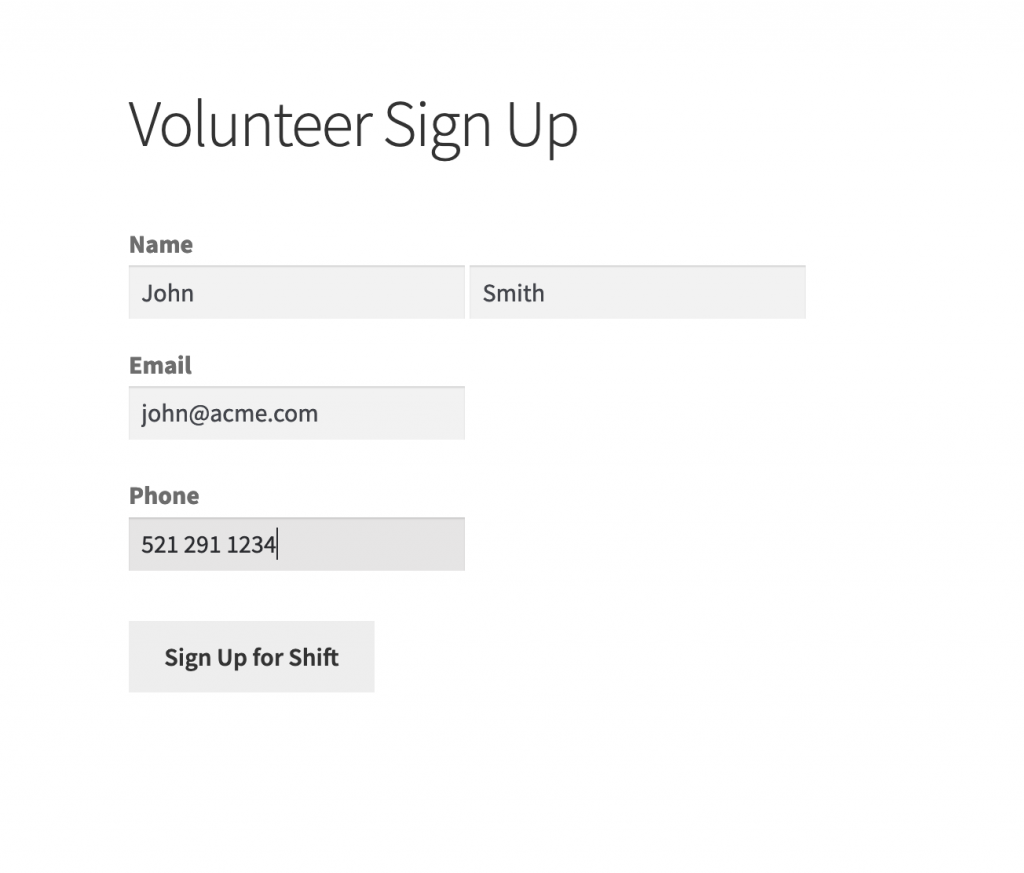
You can test out your new Calendar and form by Signing up a Volunteer. Click on any Volunteer Shift form the Shifts Calendar page. Let’s sign up for this shift.
Clicking on the event will forward to the Signup page where you can fill in the contact info.
Here’s how the record shows on Salesforce.
We used the Sawfish plugin to setup the Salesforce WordPress integration for the Volunteer Signup Calendar functions.
Check out more things you can do with the plugin :
You can check more pages here!