This article explains how to easily show Salesforce records on WordPress. No coding needed.
We will retrieve a list of records from a Custom object Sessions and display the same on a WordPress page. We do this by using the Sawfish plugin to connect with the Salesforce to receive the record information in real-time from Salesforce.
You can download and install the plugin from here.
In this example we’ll display record information from a custom object named Sessions. The object is a list of training events with information regarding dates and levels. You can use the plugin to display fields from any Standard or Custom object.

The first step is to make sure you have the connection setup between your Salesforce instance and WordPress using Sawfish plugin.
Follow the instructions here: Install and Setup Sawfish Salesforce Integration Plugin for WordPress
We will add a calendar on a WordPress page that shows the list of upcoming sessions. This will use the Calendar view option on the plugin, the same steps can be followed to show Tables and Cards as well.
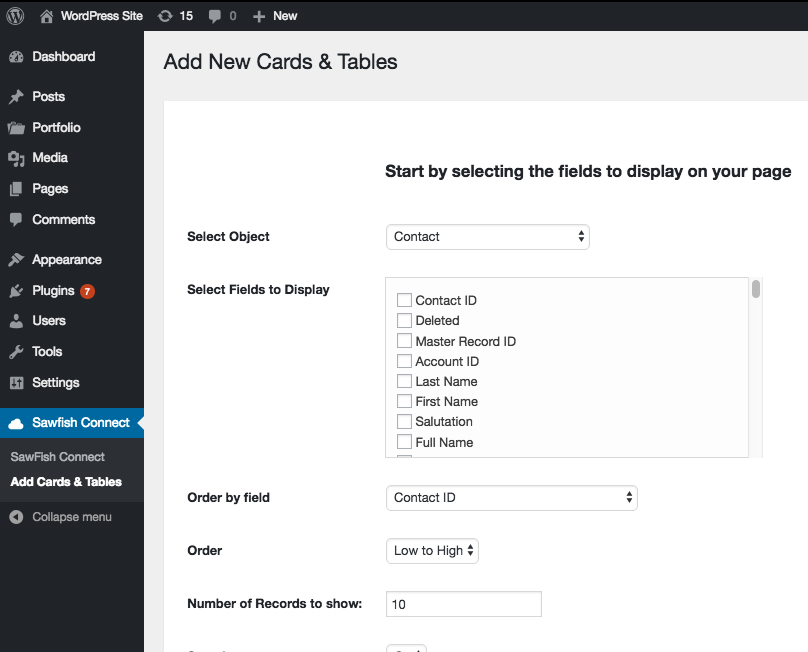
From your WordPress Dashboard select Sawfish Connect, Click on Add Cards & Tables.
You will see the Sawfish Connect menu option on the WordPress dashboard after installation.
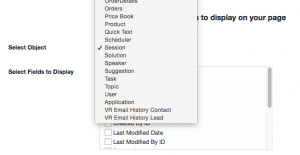
In the Select Object option you can see the objects that we can get from your connected Salesforce instance. For our events page I’m going to select the Sessions custom object, you can select any of the standard and custom objects on your Salesforce instance.
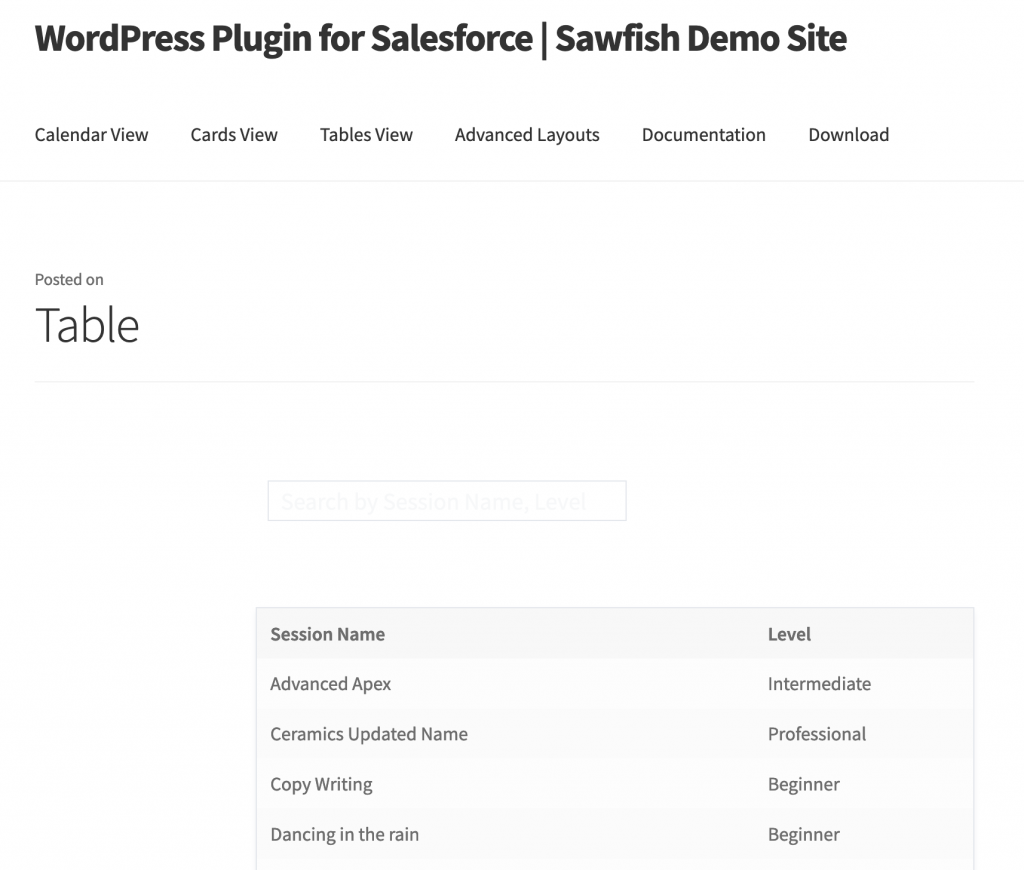
Show Salesforce Records in a Table in WordPress
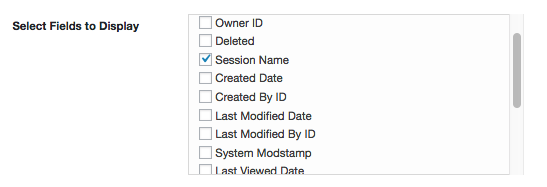
In the Select Fields to Display option lets us choose the field to show as the Event Name and the time of the event. I have selected Session Name and Level.

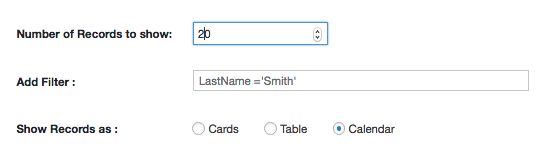
In Show Records as option select Table. There are additional options to Select the fields to Order by, Number of records to display and whether you’d like a Search box to display on the page alongside the table.
You can use the Add Filter option to only show specific Records. eg: Level = ‘Advanced’.
This would give you the option to control what records from Salesforce on the WordPress website. You can also use and combine more than one filters with AND or OR. eg: Level = ‘Advanced’ AND Name != ‘Photography’
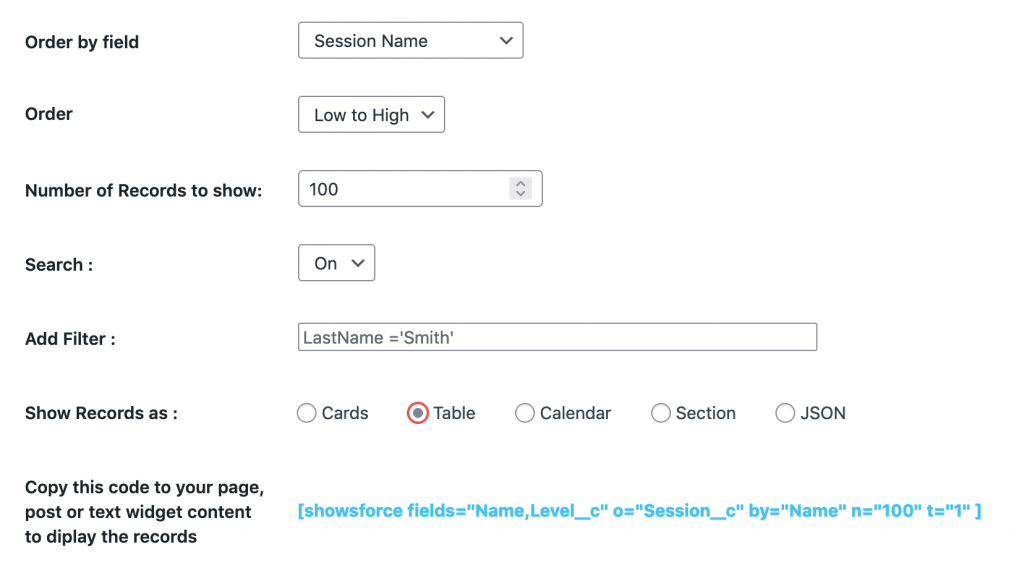
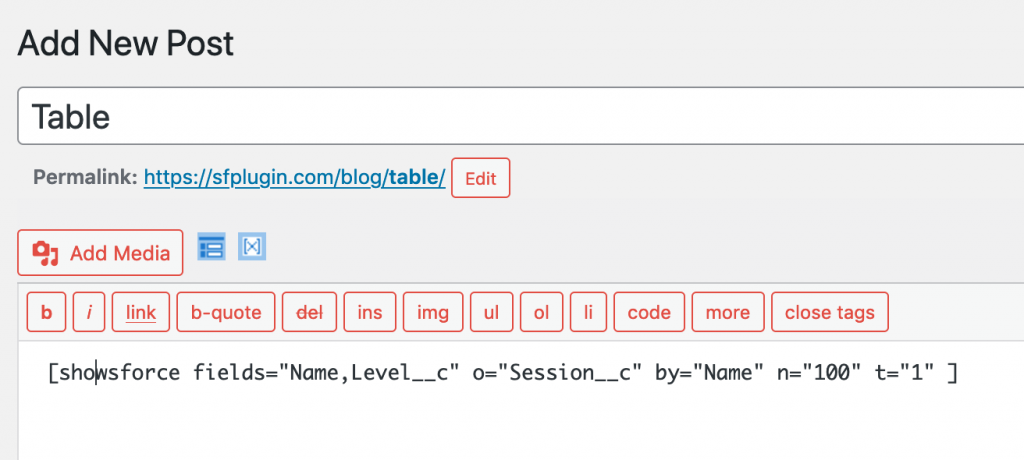
All Done! You can now copy the shortcode that’s created and paste onto any of your pages and posts. Yes, this shortcode works on your favorite website builders like Elementor, Divi, WPBakery and more!
Here’s how the page shows!
The search is added automatically, you can search by any field that’s included in the table.
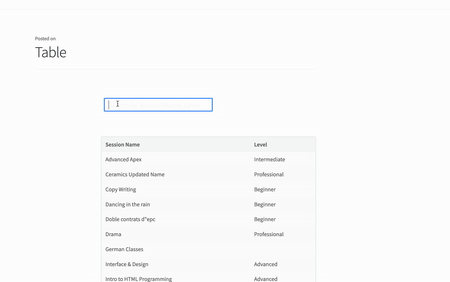
The records are pulled real-time (no syncing onto WordPress), so any updates made in Salesforce will show instantly on the page after refreshing.
The plugin gives also gives an option to display records in a Calendar layout. For this you’d require a Date or Datetime field present in the object to use as the event date.
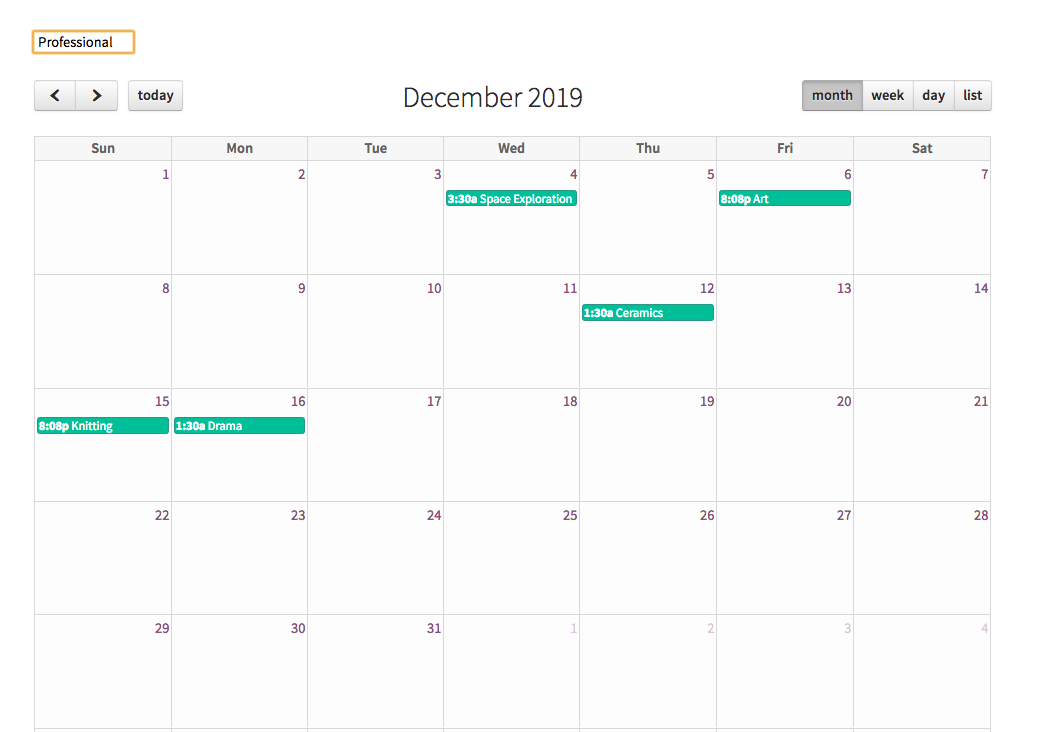
Show Salesforce Records in a Calendar in WordPress
In the Select Fields to Display option lets us choose the field to show as the Event Name and the time of the event. I have selected Session Name and Session Date.
The number of records option lets you select the number of records, in our case events to retrieve from Salesforce. I have selected 20. In Show Records as option select Calendar
We can use the Category field to filter events displayed on our Calendar. I have selected Level this would let us show Beginner, Professional, Advanced etc. sessions separately.
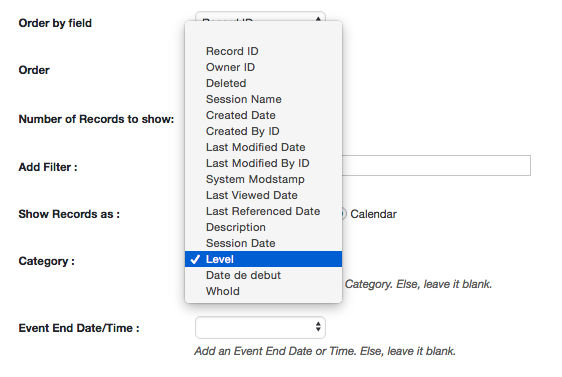
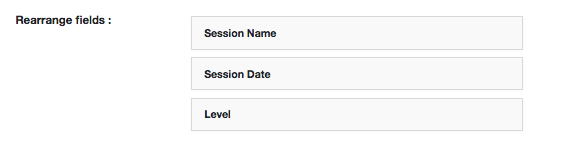
Finally, rearrange the fields to let the plugin know info to be used for Event Name and Date. Move the field used in for Event Name (Session Name) in the first position and Event Date (Session Date) field as the second.
All done! Now we can copy and paste the code to our WordPress Pages and Posts to show our Calendar. Click to copy the code in blue text.

Form the WordPress Dashboard, click Add New from Pages. You can display the records on Posts, Widgets and other Website sections as well.
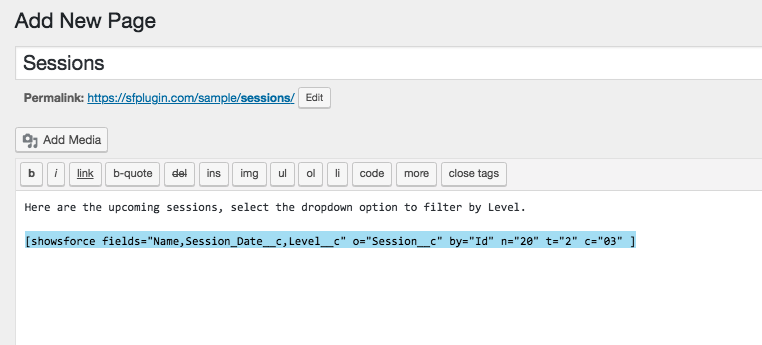
Click the Publish button to view the Page. Click view page to see the page we created.
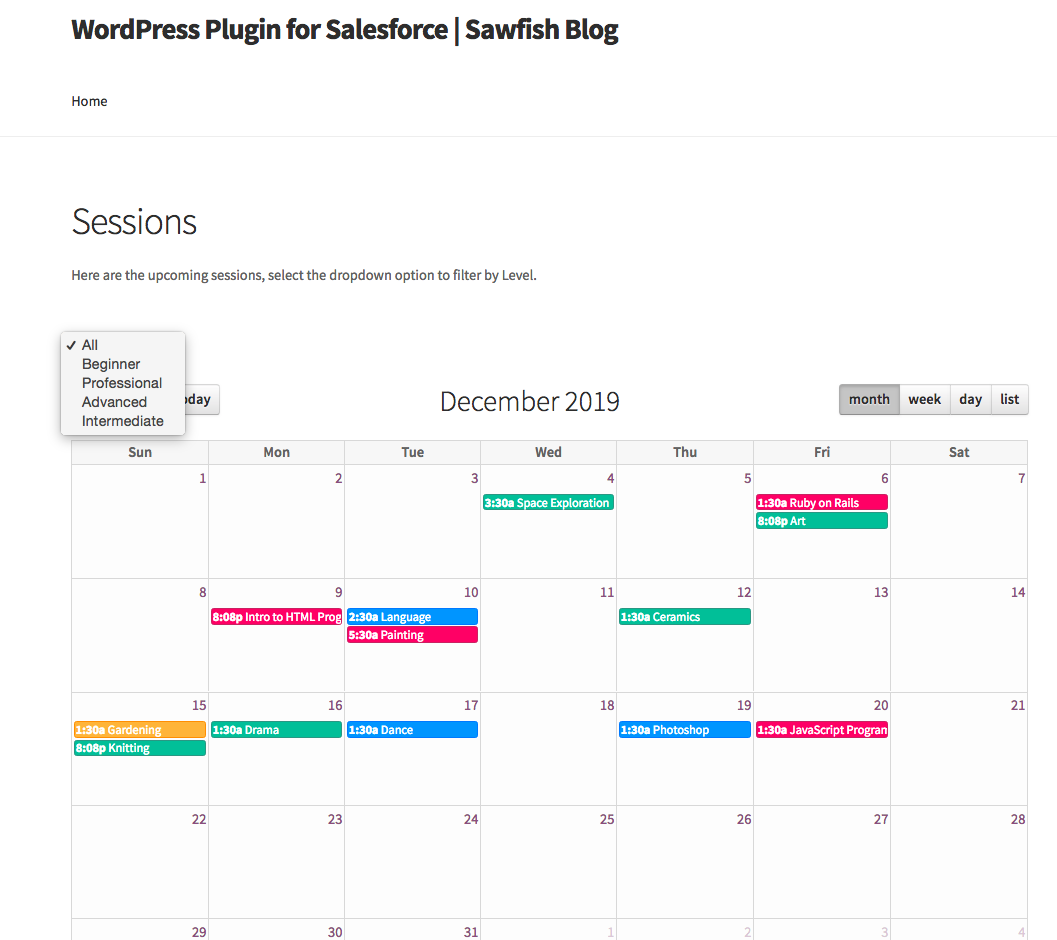
We can now filter the events based on selected Level using the drop down!
Let’s see how real time updates to date happen. Back in Salesforce our instructor wants the Gardening session to be called Landscaping instead.
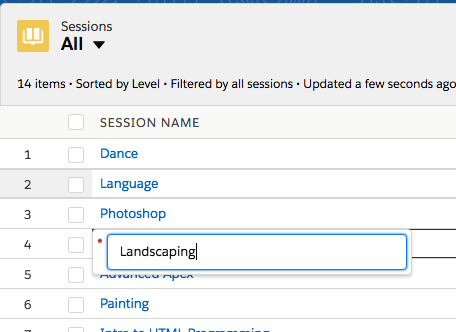
After saving the change to the Session name on Salesforce, just refresh the new page on WordPress.
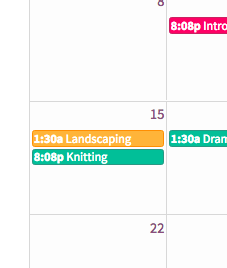 There’s the updated event name! The pages now show real time data from Salesforce. You never have to worry about having to copy paste anything from Salesforce and WordPress or update numerous event plugins.