You can easily setup forms similar to Web-to-Lead for Web-to-Contact or Web-to-Account and other objects used in your Salesforce instance. This post explains how you can set up these forms to send information from WordPress to Salesforce. No coding knowledge needed!
Using Elementor Pro? you can build the same forms with Elementor as well.
Firstly, we review some of the limitations of the standard Web-to-Lead feature. After that, we show how you can setup Web-to-Lead, Web-to-Contact, Web-to-Account or any Salesforce object. These can be deployed and added to any of your WordPress pages or posts.
Table of Contents
Major Limitations of Web-to-Lead
- Cannot connect to other objects
- There is limit of 500 leads
- Does not send email notifications
- Restrictions on lookup fields
- Not easy to manage multiple forms
Setup Salesforce and WordPress integration for Web-to-Lead, Web-to-Contact, Web-to-Account forms
Here’s the steps to setup a Web-to-Contact, Web-to-Account or a Web-to-Lead for Salesforce on your WordPress website
- Install and setup the Sawfish WordPress plugin
- Using the integration to setup a Web-to-Lead form (Example)
- Setup a Web-to-Contact and Web-to-Account form
- Email Notifications for the forms
- Publish your form
What is Web-to-Lead?
Salesforce Trailhead has a module on how Lead Management can be used to grow your business. Salesforce Web-to-Lead is an essential feature that gives you the ability to capture Lead information directly from your website. However, it comes with several limitations. The main one being that you can only connect to the Lead object.
We will cover some more of these limitations in this article. Also, we explain how you can easily setup a full integration between Salesforce and your WordPress website that lets you set up Web-to-Contact, Web-to-Account or any custom object forms without these limitations! It is works with both Salesforce Lighting and Classic.
Major Limitations of Web-to-Lead
Cannot connect to other objects.
Web-to-Lead is a feature designed to collect Lead information only. While there is a similar function for collecting Case information, it cannot be used to Create Contacts, Accounts and other object records.
There is limit of 500 leads
Salesforce has placed a restriction of 500 leads per day that can be created using Web-to-Lead forms. This is regardless of the number of forms you create using the feature.
Does not send email notifications
Web-to-Lead notifications have to be set up via a Workflow. It doesn’t send an email when a lead is created.
Restrictions on lookup fields
Lookup fields cannot be populated via Web-to-Lead forms, as pointed by a member of the community. This is essential if you have a business rule that assigns all Leads to a particular User or Account or any related object record.
Not easy to manage multiple forms
Finally, many organizations would want to have multiple lead pages from various landing pages and campaigns. It is not ideal to set up forms from scratch for each of these pages. It is also common to run into a need to update existing forms; managing these edits is a pain.
Setup Salesforce and WordPress integration for Web-to-Lead, Web-to-Contact, Web-to-Account forms
The first step is to connect Salesforce and WordPress. The Sawfish plugin utilizes the Salesforce API to set up a robust integration between your Salesforce instance and WordPress website. This means you can send and receive information between the two systems – without the Web-to-Lead limitations!
Install and setup the plugin
Download the plugin from the Sawfish website and follow the step-by-step instructions to set up the integration.
The plugin sets up an integration using the Salesforce API, once the connection is active you can show Salesforce records on WordPress and send form information to Salesforce!
Let’s set up a form to capture Lead information. The same steps can be followed for Web-to-Contacts, Web-to-Account and Web-to-any Salesforce object!
Set up a Web-to-Lead, Web-to-Account and Web-to-Contact form
We’ll use the HTML forms plugin to quickly set up forms for any Salesforce object. Compared to other clunky form plugins it is brilliant, light weighted and loaded with just the essential features.
How to setup a Web-to-Lead form (Example)
Click on Add New Form from HTML forms.
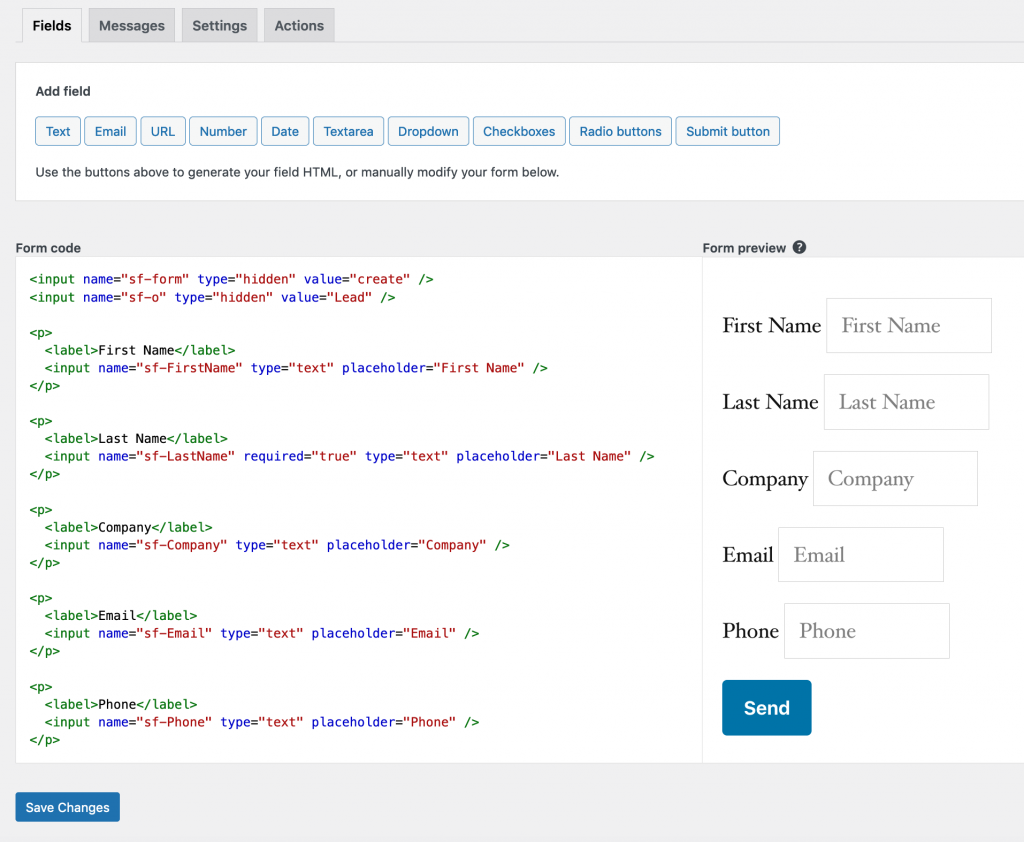
The interface is easy to use. You can drag the fields on to the forms section and set the values for specific fields.
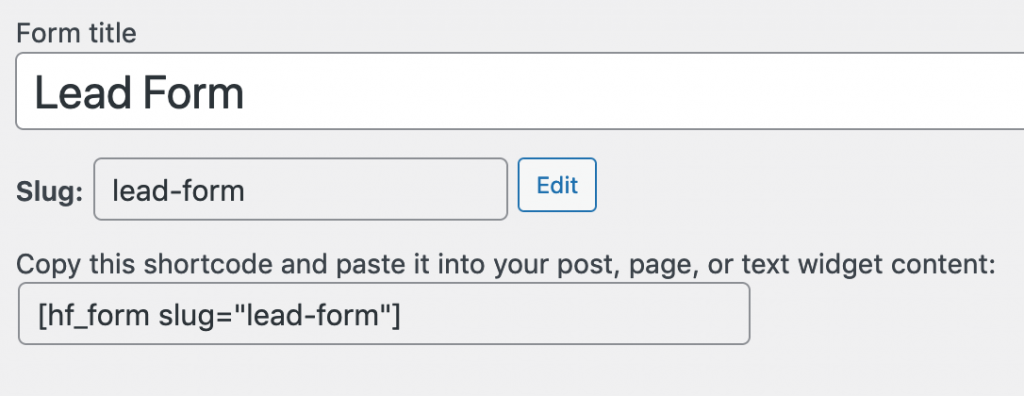
Copy paste short code to the page where you’d like to show the form.
We need to specify a few additional fields so that it’s set up to collect Leads. You can use this code below to quickly set up a Lead form.
The name=”sf-o” field sets the object to connect as Lead (value=”Lead”). The name=”sf-form” sets this as a form to create records. You can use the form to update records as well!
Mark fields in sf-Field Name format. Here we have added Names, Email and Phone. You can set say field LeadSourceas sf-LeadSource.
<input name=”sf-LeadSource” type=”text” value=”Web” />
You can use set values for lookup fields as well! Something that’s not possible with the standard Web-to-Lead form.
<input name=”sf-Campaign__c” type=”hidden” value=”7010K000001hnCRQAH” />
Setup a Web-to-Contact and Web-to-Account form
Here’s the code for sending Contact information from WordPress to Salesforce.
<input name="sf-form" type="hidden" value="create" />
<input name="sf-o" type="hidden" value="Contact" />

<label>First Name</label>
<input name="sf-FirstName" type="text" placeholder="First Name" />

<label>Last Name</label>
<input name="sf-LastName" required="true" type="text" placeholder="Last Name" />

<label>Email</label>
<input name="sf-Email" type="text" placeholder="Email" />

<label>Phone</label>
<input name="sf-Phone" type="text" placeholder="Phone" />

<input name="sf-AccountId" type="hidden" value="0012800000KKPAPAA9" />

<input type="submit" value="Send" />
same can be done for Accounts as well, just change the sf-o to Account and set the fields.
<input name="sf-form" type="hidden" value="create" />
<input name="sf-o" type="hidden" value="Account" />

<label>Name</label>
<input name="sf-Name" type="text" placeholder="Name" />

<label>Type</label>
<input name="sf-Type" type="text" placeholder="Type" />

<label>Phone</label>
<input name="sf-Phone" type="text" placeholder="Phone" />

<label>Website</label>
<input name="sf-Website" type="text" placeholder="Website" />

<input type="submit" value="Send" />
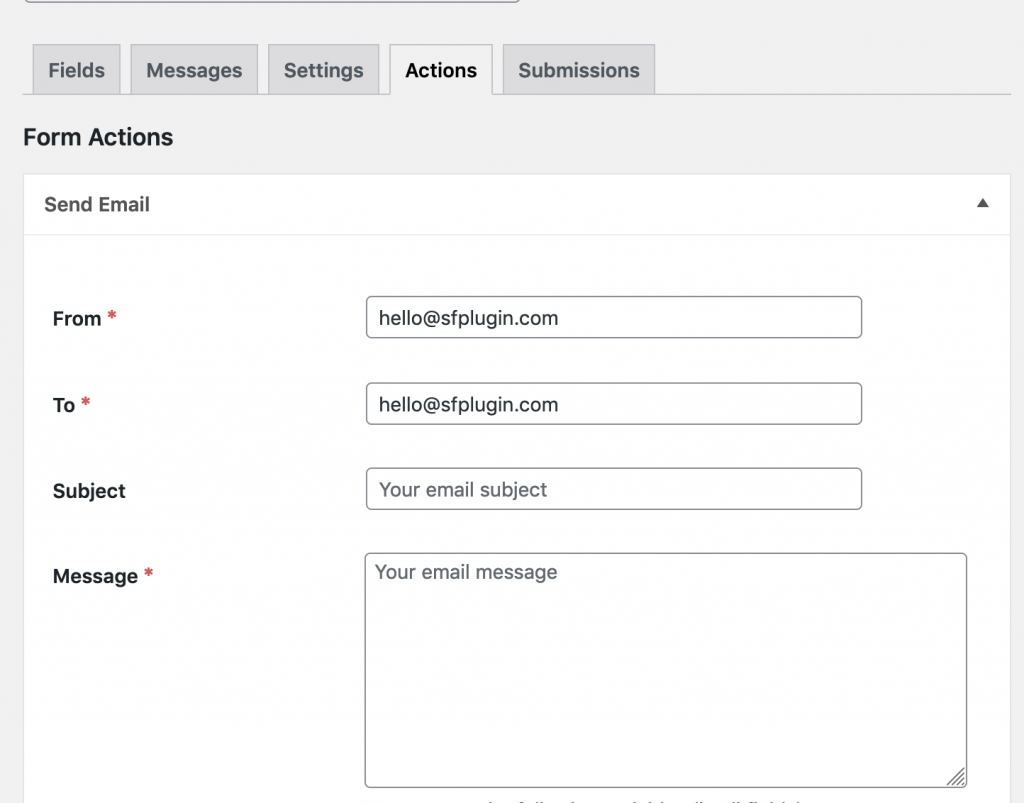
Setup Email Notifications
This function will notify you whenever a new Lead or form submission is created.
Publish your form
Copy the shortcode and paste it onto a WordPress page or post.
What more can the Sawfish plugin do?
- Show records in Card, Calendar and Table layouts
- Set up a Portal to login unlimited users!
- Set up a Volunteers Signup features for Volunteer4Salesforce
You can check more pages here!