Building a dynamic job board that syncs directly with Salesforce is a brilliant way to save time. Instead of manual data entry, your WordPress site updates in real-time with the latest Jobs that you add from Salesforce. This article shows how you can use the Sawfish Plugin to quickly set up a job listing page on WordPress.
Estimated Time Needed: 5 minutes
We are going to create two simple pages:
- The Job Board: A list of all open positions with “View Details” links.
- The Job Detail Page: A page that automatically fills with the specific Job Title, Description, and City based on which job was clicked.
2. Step 1: Create the Job Board (The List)
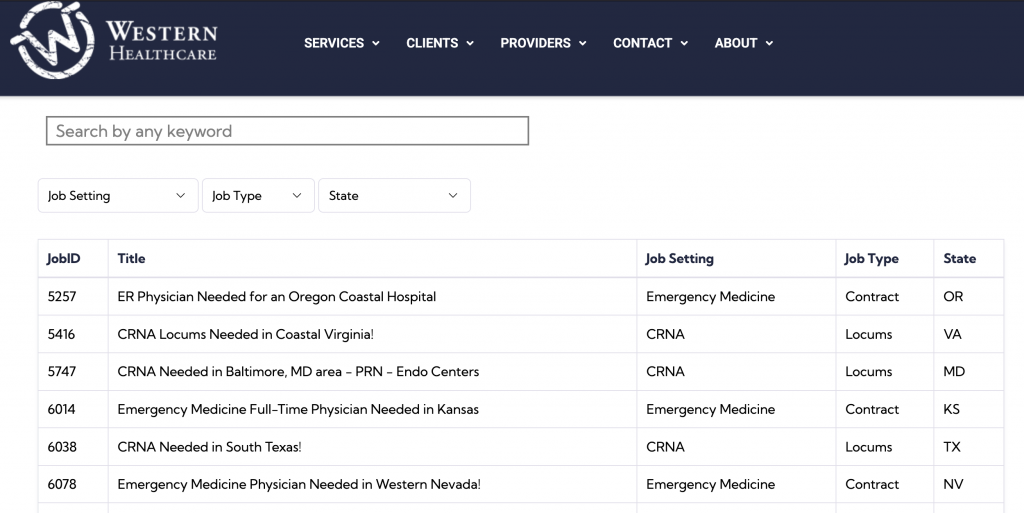
On your main “Careers” page, you’ll want a clean table of jobs. Paste the following shortcode into your WordPress editor.
[showsforce fields="Job_Title__c, City__c" o="Job_Object__c" limit="10" search="on"]
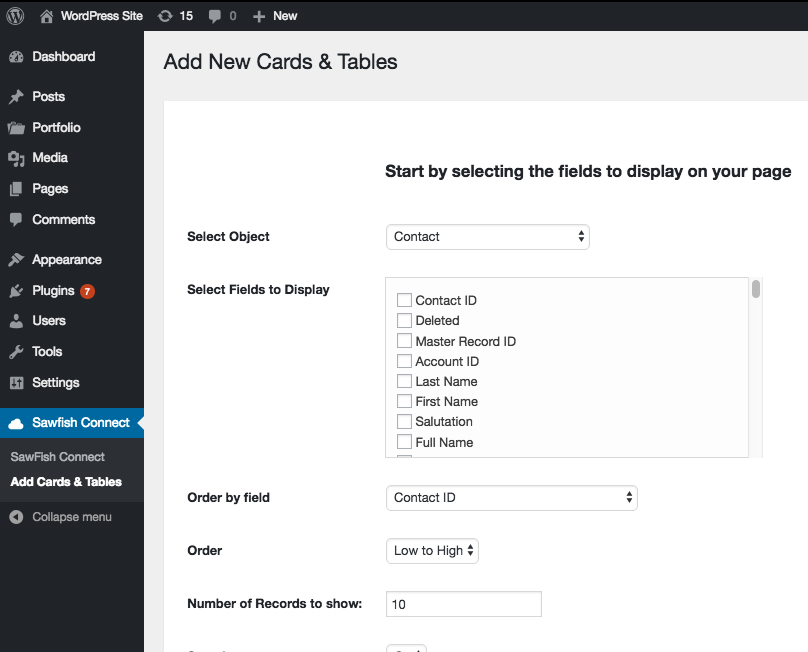
You also use the Add New Layout feature from the plugin to generate your shortcode with desired fields and filters.
The Sawfish plugin shortcode lists the Job listing records in a neat searchable table. You can also add filters to only shows the jobs you want.
This script after it makes the rows “clickable” so users can jump to the full description. Note how it’s set to navigate to /job-details page. You can set any value here, as long as it’s consistent everywhere.
The Redirect Script & Table
[showsforce fields="Job_Title__c, City__c" o="Job_Object__c" limit="10" search="on"]

<script type="text/javascript">
window.onload = function() {
  jQuery(document).on('click', '.sforc-row', function () {
    // This sends the user to your detail page with the Job ID attached
    var recordId = jQuery(this).attr('data-sforclink');
    window.location.href = window.location.origin + "/job-details/?sId=" + recordId;
  });
};
</script>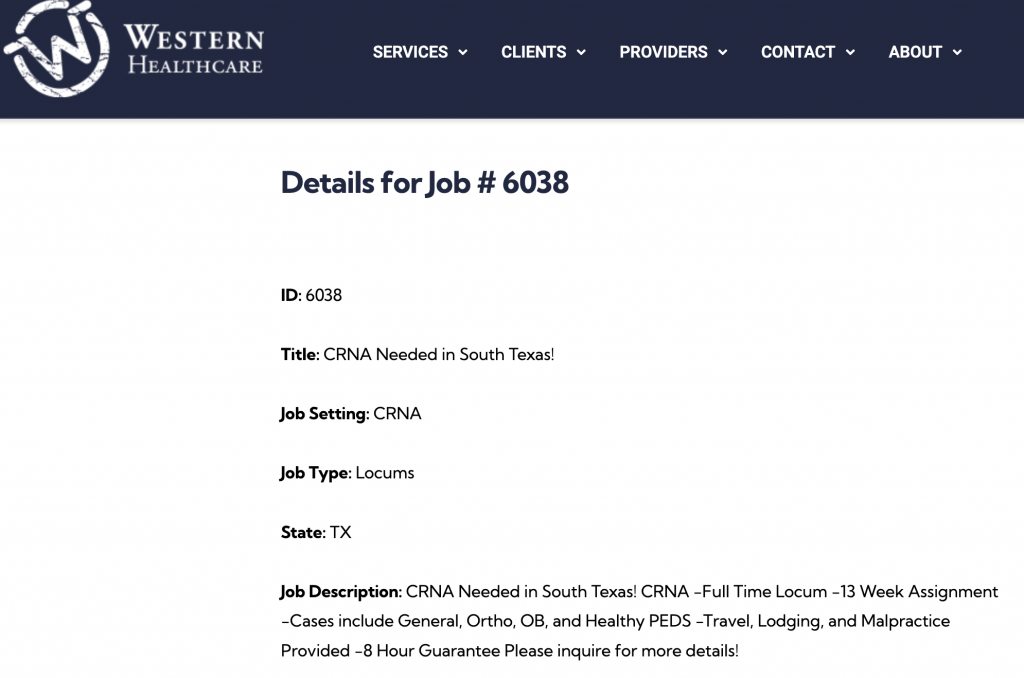
3. Step 2: Create the Job Detail Page
Create a new page in WordPress with the URL slug job-details. This page acts as a Job Details section that changes its content depending on which job was selected. It can show Long Text and Rich Text fields.
Paste this shortcode into the page:
[sectionsforce o="Job_Object__c" filter="Id='{!sId}'"]

  <h1>{!Job_Title__c}</h1>
  <h3>Location: {!City__c}</h3>

  <hr />

  <h4>About the Role</h4>
  <div class="job-description">
    {!Job_Description__c}
  </div>

[/sectionsforce]
4. How it Works
- The Filter: The
filter="Id='{!sId}'"part is the secret sauce. It looks at the URL (thesIdwe sent from the first page) and tells Salesforce: “Only show the data for this specific job ID.” - The Fields: Using
{!FieldName}allows you to drop Salesforce data right into your layout like a Salesforce Email template.
5. Further Enhancements
Yes, you can also add a form here so your candidates can submit their information. Check out the post below to see how you can add a form.
How to send form information from WordPress to Salesforce
Feel free to send us a message if you’d like more information on setting this up.